Configuring Javascript SyntaxHighligher 3+ in a Blogger site
In this post I tactically outline a quality way to configure the Javascript based SyntaxHighlighter library into a Blogger site. The configuration below makes use of the recent autoloader available in version 3 and greater of the SyntaxHighlighter. The configuration code below is in fact using the SyntaxHighlighter which incidentally allows you to copy the code examples quickly. Check out this very popular library here.
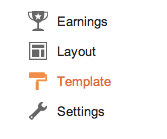
2. Click the Template link from the sidebar of the Blogger Site main page shown below.
3. Save the template, if you choose, by clicking on Backup/Restore in the upper righthand corner and following the instructions. Better to be safe rather than sorry if you are not familiar with HTML, JS and CSS. Either way the changes are quick, simple, and typical for those at all familiar with JS and CSS.

4. Click the Edit HTML button right under the layout which the site currently uses.

. See below:Configuration:
1. Login into blogger.com and click/select the site you want to configure (http://www.blogger.com/home) to support syntax highlighting. Generally if there are multiple sites you would like to enable each site's template will need to be configured individually.2. Click the Template link from the sidebar of the Blogger Site main page shown below.
4. Click the Edit HTML button right under the layout which the site currently uses.
Note: We are going to put the Javascript at the bottom of the body and CSS at the top in the header as one always should.5. Copy the CSS links into the ... tags near the top of the file. I would recommend copying and pasting this just after the ending tag for the main Blogger CSS
<head>
...
</b:skin>
...
<!-- CSS from CDN JS for SyntaxHighligher -->
<link href='//cdnjs.cloudflare.com/ajax/libs/SyntaxHighlighter/3.0.83/styles/shCore.css' rel='stylesheet' type='text/css'/>
<link href='//cdnjs.cloudflare.com/ajax/libs/SyntaxHighlighter/3.0.83/styles/shThemeDefault.css' rel='stylesheet' type='text/css'/>
</head>
Notice a couple of important features. The files are served up from a solid CDN; this improves performance/reliability. Additionally the urls allow for either http or https to prevent security warnings which can sometimes happen.
6. Next copy the Javascript references, again from the CDN, into the bottom just before the
closing tag. You may already have Javascript there such as google analytics it should not matter if it is before or after.
<!-- SyntaxHighlighter -->
<script src='//cdnjs.cloudflare.com/ajax/libs/SyntaxHighlighter/3.0.83/scripts/shCore.js' type='text/javascript'/>
<script src='//cdnjs.cloudflare.com/ajax/libs/SyntaxHighlighter/3.0.83/scripts/shAutoloader.js' type='text/javascript'/>

<script type='text/javascript'>
SyntaxHighlighter.autoloader(
  'js jscript javascript  //cdnjs.cloudflare.com/ajax/libs/SyntaxHighlighter/3.0.83/scripts/shBrushJScript.js',
  'xml xhtml xslt html xhtml //cdnjs.cloudflare.com/ajax/libs/SyntaxHighlighter/3.0.83/scripts/shBrushXml.js',
  'java  //cdnjs.cloudflare.com/ajax/libs/SyntaxHighlighter/3.0.83/scripts/shBrushJava.js',
  'sql  //cdnjs.cloudflare.com/ajax/libs/SyntaxHighlighter/3.0.83/scripts/shBrushSql.js'
);
SyntaxHighlighter.config.bloggerMode = true;
SyntaxHighlighter.all();
</script>
In the code above you can clearly see how to configure the SyntaxHighligher.autoloader. This is more efficient as it dynamically loads the addition brushes specified when needed. This example loads brushes for Javascript, XML/HTML, Java, and SQL. You can learn more about the autoloader its website: http://alexgorbatchev.com/SyntaxHighlighter/manual/api/autoloader.html. Additionally, this example includes turning on bloggerMode which seems like an appropriate thing to do. However, I do not know what it mitigates or provides.
7. Make sure your tags are closed and then click the Save Template button. If it saves and Blogger does not report an errors you should be done. That was not bad at all. You can now add pretty formatted code to any for your blog posts.
8. Use SyntaxHighlight in your posts, there is nothing Blogger specific so off you go. I would recommend referring to the documentation directly: http://alexgorbatchev.com/SyntaxHighlighter/manual/installation.html. It has summarized the pros and cons of the two approaches well enough. Also be sure to poke around the additional configuration options as this post just shows the already excellent default.
Comments